
Everything You Need to Know Before You Buy
Kindorf brackets are an essential component for many construction and engineering projects. With the right brackets, you can securely mount pipes, conduit, ductwork, cable trays and more. But with so many options, sizes and load capacities available, choosing the right Kindorf bracket for your specific needs can be a challenge.
This in-depth buying guide covers everything you need to know before purchasing Kindorf brackets for your next project. We’ll walk through common applications, materials, sizes, load capacities and key buying considerations – with tips for choosing the right product. Read on for the complete guide to selecting and purchasing the perfect Kindorf brackets for any job.
What Exactly Are Kindorf Brackets?
Kindorf brackets are a type of channel bracket used to securely mount a variety of objects to walls, ceilings, floors or frameworks. They feature an open channel design that allows mounting around various types of pipes, bars, conduits and more.
Kindorf brackets get their name from the Kindorf company, which first patented this style of channel bracket. Today, Kindorf remains a leading manufacturer of channel and strut framing systems. Their brackets are known for durability, versatility and ease of installation.
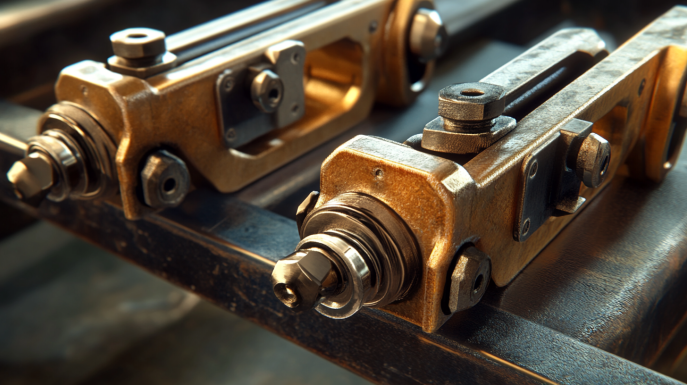
![Kindorf Bracket][]
A typical Kindorf bracket.
Some key features of Kindorf brackets:
- Open channel design – Allows brackets to be mounted around various items.
- Multiple mounting holes – For securing to floors, walls or frameworks.
- Heavy duty construction – Typically made from high grade steel or stainless steel.
- Made in a range of sizes – To support different load capacities.
- Compatible accessories – For clamping items inside the channel or connecting brackets.
Kindorf brackets have many uses in commercial and industrial settings. Their most common applications include:
- Mounting pipes, conduit or tubing – Secures plumbing, electrical, HVAC and processing piping.
- Mounting cable trays or ladder racks – Provides support for electrical and data cable runs.
- Building equipment frameworks – Used with strut channels for customized structural supports.
- Ductwork and vent supports – Provides sturdy hanging or mounting supports.
- Solar panel frameworks – Secures solar modules to roof or ground mount systems.
Many features make Kindorf brackets ideal for these and other uses. We’ll cover the benefits and applications of Kindorf brackets in more detail throughout this buying guide.
Where Can I Buy Kindorf Brackets?
Kindorf brackets are commonly used in commercial construction, facilities maintenance and engineering projects. As a result, they are widely available from industrial suppliers, online retailers and construction equipment vendors. Here are some of the best places to buy Kindorf brackets:
- Industrial supply distributors – Check local suppliers of electrical, HVAC and construction components. Many carry a selection of Kindorf brackets on the shelf.
- Online industrial retailers – Numerous e-commerce sites sell Kindorf brackets, often with custom length or gauge options.
- Amazon – Limited selection of common bracket sizes available for quick shipping.
- Grainger – Carries many varieties of Kindorf brackets for next day delivery.
- McMaster-Carr – Stocks and ships a wide array of brackets and accessories.
- Fastenal – Local stores offer convenient access to Kindorf bracket inventory.
- HD Supply – Specializes in facilities maintenance and infrastructure products.
- Westlake Royal Building Products – Leading supplier of Kindorf branded brackets.
- Direct from Kindorf – The manufacturer sells brackets through local distributors.
When buying online, be aware that many low-priced listings are overseas knock-offs and not genuine Kindorf brackets. For guaranteed quality, purchase through authorized Kindorf dealers or reputable industrial suppliers.
How to Install Kindorf Brackets
One of the advantages of Kindorf brackets is their simplicity to install. Here is a quick overview of the basic installation process:
Mounting the Bracket
- Determine mounting location – Hold bracket in place and mark holes.
- Drill holes for mounting hardware.
- Insert and secure lag bolts or other mounting anchors.
- Level and align bracket – Use washers or double nuts to adjust angle if needed.
- Tighten mounting hardware to torque specs.
Securing Items Inside Bracket
- Place item inside open channel of bracket.
- Slide clamp accessory over item and fit inside channel.
- Tighten clamping bolt to secure in place without crushing.
For heavy items, use two clamps per bracket spaced at third points. Safety cables are also recommended as a backup for critical systems.
Follow all included instructions for proper installation. Using the right mounting hardware for the substrate and securely tightening all connections is critical for safety and performance.
Kindorf Bracket Materials
Kindorf brackets are made from steel for maximum strength. The most common options include:
- Stainless steel – Ideal for wet, corrosive environments. More expensive but very durable.
- Galvanized steel – Zinc coating helps resist rust. Good general purpose option.
- Plain steel – Typically coated in gray paint or black oxide finish. Most economical choice.
- Aluminum – Lightweight but not as strong. Only recommended for light duty applications.
Stainless steel is best for outdoor use or wet, humid conditions. It provides the greatest corrosion resistance. Galvanized steel brackets offer a good balance of strength and corrosion protection at a moderate cost.
Heavy duty 11 gauge and 3/8″ brackets are available for high capacity loads up to 1400 lbs per pair. When used with strut channels, load capacities over 5000 lbs can be achieved.
Kindorf Bracket Sizes
Kindorf brackets come in a wide range of channel sizes to support different capacity loads. The channel opening will need to fit your particular item such as a 1″ pipe or 4″ x 4″ electrical conduit.
Some of the most common sizes include:
- 3/4″ channel – For mounting up to 1″ pipe or conduit.
- 1-5/16″ channel – Accommodates items up to 2″ diameter.
- 2″ channel – For pipes, conduit or brackets up to 3″ diameter.
- 2-5/8″ channel – Supports 4″ to 4-5/8″ diameter items.
- 4″ channel – For large 6″ to 8″ diameter pipes or frames.
Bracket heights range from 2″ up to 20″ tall for mounting large ducts or cable trays. Extender brackets can provide an even deeper channel when needed.
Choosing the right size bracket involves matching your item’s dimensions as closely as possible while still allowing some fit tolerance. Oversized channels leave room for vibration while undersized brackets won’t work.
Load Capacities for Kindorf Brackets
Load capacity is one of the most important specifications to consider when selecting Kindorf brackets. You need to choose brackets rated for the total weight they will carry.
Load capacity depends on:
- Bracket size – Channel width and height.
- Gauge/thickness – Thicker steel handles greater loads.
- Materials – Stainless steel offers high strength.
- Mounting method – More anchors provide greater support.
- Use of accessories – Clamps, sleeves, etc. boost capacity.
Typical load capacities of common Kindorf bracket configurations include:
- 3/4″ stainless channel bracket – 115 to 150 lbs per pair.
- 2″ galvanized bracket with clamps – 700 to 1200 lbs per pair.
- 4″ aluminum channel bracket – Up to 500 lbs per pair.
- 12″ carbon steel bracket with strut – 4000 to 5000 lbs per pair.
- Heavy duty welded bracket with gussets – Up to 14,000 lbs per pair.
Refer to manufacturer specs for rated capacities to ensure brackets can handle expected loads. Exceeding load ratings can lead to failure. Allow a safety margin too.
Choosing the Right Kindorf Bracket
Here are the key steps for choosing optimal Kindorf brackets for your application:
- Determine required load capacity – Max expected weight of items when installed.
- Measure mounting surface and clearance space.
- Measure diameter or dimensions of pipes, conduit or other items.
- Identify optimal bracket size to fit items with some clearance.
- Select appropriate material – Stainless, galvanized or carbon steel.
- Choose bracket height based on space available.
- Consider desired orientation – Vertical, horizontal or sloped.
- Select heavy duty gauge if needed for high loads.
- Add necessary accessories – Clamps, sleeves, gussets.
- Confirm load rating meets or exceeds capacity needed.
Also check any architectural specs, building codes and industry standards relevant to your application. Taking the time to properly select the right Kindorf brackets saves time and money in the long run.
Types of Kindorf Brackets
While the standard channel bracket is most common, Kindorf also offers specialized bracket designs for specific installation requirements:
- Reducing brackets – One side has a smaller channel size to transition between different items.
- Welded brackets – Angle brackets permanently welded to channel bracket for added support.
- Side mounted brackets – Allows mounting from the side rather than just the base.
- Double wide brackets – Provides two channels for multiple conduits in one bracket.
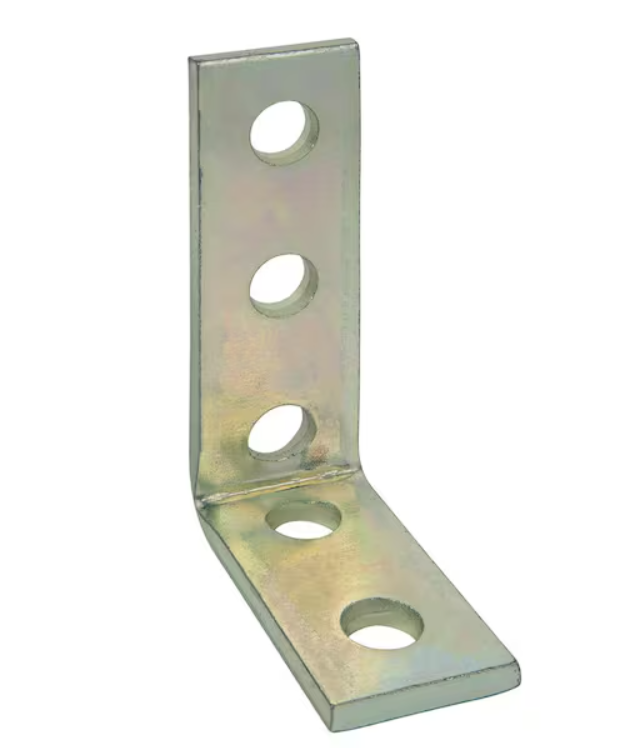
- Wall-mounted brackets – L-shape ideal for mounting conduit vertically to walls.
- Low profile brackets – Minimize protrusion from the mounting surface.
- Extension brackets – Extra deep to extend further from the mounting point.
- Swivel brackets – Pivot connectors allow conduit movement after installation.
There are also heavy duty support brackets designed specifically for solar power racking systems. Getting the right shape and size bracket for your particular requirements makes installation more seamless.
Connecting Kindorf Brackets and Strut
Kindorf channel brackets are often used together with Kindorf strut channels to create customized structural framing systems.
The open back design allows strut to slide right into the channel bracket. This provides secure continuous support over any length needed.
To connect Kindorf brackets and strut:
- Insert length of strut into channel of bracket.
- Align strut holes with bracket holes.
- Insert bolts through both pieces and add washers and nuts.
- Tighten bolts to lock strut and bracket together.
- Use splice plates to join additional strut pieces end to end.
With this simple process you can create permanent structures or moveable frames to mount equipment. Kindorf brackets and strut together offer unlimited options for industrial use.
Common Applications of Kindorf Brackets
The unique open channel design makes Kindorf brackets ideal for mounting all sorts of industrial and commercial items. Here are some of the most common applications:
Electrical conduit – Provides reliable mounting for surface or exposed conduit runs. Easy to insert various conduit sizes.
Cable trays – Mounts cable trays neatly off ceilings and walls. Simplifies cable routing.
Solar frameworks – Securely mounts rows of solar modules to ground or roof racks.
HVAC ducting – Sturdy steel brackets support large ducts and ventilation pipes.
Plumbing & fire suppression – Mounts pipe neatly and safely. Allows for pipe expansion and contraction.
Machinery frames – Use with strut channels for stabilizing machinery, punch presses, motors and more.
Material handling – Provides overhead support for conveyors, monorails, rollers and crane systems.
Building frames – Used with strut channels for canopies, mezzanines, catwalks and more.
Wiring – Offers an alternative to J-hooks for hanging wire and cables off ceilings and rafters.
The possibilities are endless. Kindorf brackets bring reliability, organization and a clean aesthetic to infrastructure installations.
Installing Kindorf Brackets Safely
While extremely sturdy, proper installation is still key to getting the full strength from Kindorf brackets. Here are some tips for safe and secure use:
- Carefully follow load capacity ratings – Do not overload brackets.
- Use the proper mounting hardware for your substrate – Concrete, steel, wood etc.
- Distribute heavy loads across multiple brackets spaced at regular intervals.
- Keep channels clear of debris that could prevent clamping.
- Use lock washers, double nuts or thread locking compound on all bolts.
- Allow for thermal expansion of pipes – Do not make channels too tight.
- Use adequate bracket gauge and thickness for the load.
- Provide enough vertical clearance for pipe expansion on steam lines.
- Use safety cables for critical systems as a backup precaution.
- Test installed brackets under controlled conditions before putting them into full service.
Following good practices during bracket selection, installation and use helps prevent damage or injuries. Consult an engineer for high load structural supports.
Adjustable Kindorf Brackets
While most Kindorf brackets have fixed channels, adjustable versions are also available.
Common types of adjustable Kindorf brackets include:
- Telescoping brackets – Provide a range of channel depth adjustment via sliding rear pieces.
- Swivel brackets – Use pivots and flanges to allow angular adjustment after installation.
- Jacking struts – Threaded rods with lock nuts allow height adjustment of strut frames.
- Slotted brackets – Vertical slots in mounting holes enable raising and lowering after mounting.
Adjustable brackets add flexibility for installations where you need to tweak the fit after they are in place. They are useful when the exact measurements may change.
Adjustable versions often have a lower weight capacity than standard brackets. Only use them when precise position tuning is essential.
Aligning Kindorf Brackets Accurately
Careful alignment ensures Kindorf brackets and the items they support are oriented correctly and look neat. Here are some tips:
- Use a laser level or chalk line to map out mounting hole positions accurately.
- Begin installing at the center point and work outwards in both directions.
- Mount the first bracket, use a level to orient, then secure remaining brackets based on the first.
- For long runs, allow for thermal expansion by leaving room in support spacing.
- On conduit and cable trays, allow for slope back towards the source for drainage.
- Use extender brackets as needed for proper clearance from walls or the ceiling.
- Verify alignments visually from multiple sight lines during installation.
- Make any alignment adjustments using add-on washers to tilt brackets gradually.
Proper alignment is especially critical for plumbing and electrical systems. Taking the time to orient brackets correctly results in a cleaner, more professional finished installation.
Using Kindorf Brackets for Electrical
The open channel design of Kindorf brackets makes them well suited for supporting electrical conduit and cabling. Common uses include:
- Mounting EMT, PVC, or rigid conduit runs close to ceilings, along walls or across floors.
- Providing code-compliant supports for conduit at specified intervals.
- Suspending cable tray systems with power or data cabling.
- Creating neat organized rows of MC cable.
- Supporting junction boxes, breakers and other electrical system components.
- Building custom bracket and strut frames to route cabling throughout facilities.
- Securing lighting fixtures and groups of electrical devices.
Care should be taken to group, isolate and support wires carrying different voltages properly. Consider using non-conductive strut and accessories with electrical systems.
Kindorf Bracket Accessories
Kindorf offers a complete lineup of brackets accessories to increase functionality, add strength and simplify installations:
- Clamps – Bolt around items inside channels to secure in place. Multiple types available.
- Bracket joiners – Connect two brackets linearly or at 90 degree angles.
- Gusset plates – Add thickness and strength for heavy loads.
- Mounting plates – Provide additional anchor points to surfaces.
- End caps – Create rounded, finished ends that protect from sharp edges.
- Securing rods – Pass through items and bracket for intermediate support.
- Sleeves – Slide over items before inserting into channel for a snug fit.
- Weld plates – Permanently attach brackets to structures with professional welds.
Using the right accessories improves both the function and appearance of bracket installations. They allow customizing brackets for specific needs.
How to Remove Kindorf Brackets
One advantage of Kindorf brackets is that they are designed for quick and easy installation as well as removal. Here is the typical process to remove Kindorf brackets:
- Loosen and remove any clamping accessories or securing rods.
- Loosen bolts connecting bracket to strut channels if used.
- Support load by hand or with a lift mechanism.
- Remove bolts connecting bracket to mounting surface.
- Carefully slide bracket off of pipes or other items.
- Lower and set bracket aside.
- Patch mounting holes as needed.
Of course, always take appropriate precautions when removing load bearing supports. Temporary bracing, safety straps or transfer of the load may be required beforehand.
Pro tip: Spray mounting hardware with penetrating oil a day or two before removing brackets to make disassembly easier.
The open channel design makes relocating and reusing Kindorf brackets for other projects simple. With care, they can provide many years of reliable service.
Installing Kindorf Brackets Step-By-Step
If you are new to Kindorf brackets, there are some excellent video tutorials available online that take you through the installation process step-by-step:
- YouTube – Multiple instructional videos showing real world bracket installations.
- Kindorf – Installation overview videos from the manufacturer.
- Grainger – Short installation demo videos for common applications.
- Westlake Royal Building Products – Webinars covering selection and installation.
- Fastenal – Videos reviewing basics for use in cable, conduit and pipe mounting.
Watching trained professionals install Kindorf brackets helps you learn proper techniques. The visuals allow you to see proper bracket positioning, load distribution, use of accessories and safe handling up close.
The Benefits of Using Kindorf Brackets
Hopefully this guide has shown why Kindorf brackets have remained a staple in industrial settings for decades. To recap, benefits of Kindorf brackets include:
- Strong, rigid, and durable steel construction.
- Excellent load bearing capacity.
- Customizable open channel design.
- Ease of installation and relocation.
- Simplifies meeting safety codes and standards.
- Helps organize infrastructure neatly.
- Cost-effective way to build structural frameworks.
- Provides reliable long-term equipment support.
- Manufacturer reputation for high quality products.
- Wide range of sizes and designs available.
Next time you need dependable structural brackets for mounting pipes, conduits, ducts or other items, choose the brand that engineers have relied upon for over 80 years – Kindorf. With the right selection and installation, you can feel confident your Kindorf brackets will provide a long service life.